+Style(Tuya) スマート加湿器
+Style スマート加湿器 を Tuya Cloud Development, Python SDK を用いてWoT化し、Thing として扱うための手順です。
本サンプルでは、WoTPy を使用して Python SDK を Restful API として操作出来るようにし、ノードモジュールへと対応づける例として、+Style スマート加湿器 を取り上げ WoT 化を行います。
必要なもの#
- ハードウェア
- +Style スマート加湿器
- スマートフォン
- PCやRaspberry Piなど
- ソフトウェア
+Style (Tuya Smart) のセットアップ#
Tuya Cloud Development Platform におけるPythonでの開発手順 のページに従い進めていきます。
はじめに、Tuya Smart アプリをダウンロードし、アカウントを作成・ログイン、デバイスの登録を行います。
次に、Tuya IoT Platform のアカウントを作成・ログインしAPIで制御できるように設定を行なっていきます。
手順の詳細はこちらの公式サイトの説明をご覧ください。
- Tuya IoT Platformにログイン後、
CloudからDevelopmentに移動し、My Cloud Projects pageのCreate Cloud Projectより新しいプロジェクトを作成します。 - プロジェクト作成後、
DevicesタブのAdd Deviceより、Add Device with IoT Device Management Appを選択し、表示されるQRコードをTuya Smart アプリで読み取ります。 - プロジェクトの
Assets、Debug Deviceにアクセスし、Device Debuggingで登録したデバイスを操作できることを確認します。
次に、Pythonで制御するために、tuya-connector-pythonを使用します。
pip3 install tuya-connector-pythonWoTPy を用いた Thing の作成例#
WoTPy を使用して Python で Thing を作成していきます。
本サンプルのコード例全体はこちらです。
また、WoTPy の GitHub 上のサンプルも合わせてご参照ください。
Thing Description の作成#
Thing Description の作成を行なっていきます。モジュールの import や変数の初期化を行なった後の部分に注目します。
...TD = { "title": "TuyaSmartHumidifier", "id": "urn:wot:TuyaSmartHumidifier", "description": "This is a WoT example of Tuya Smart Humidifier using WoTPy.", "@context": [ 'https://www.w3.org/2019/wot/td/v1', ], "properties": { ...... }, "actions": { ...... }}...上記の部分でそれぞれ、プロパティとアクションの定義を行ないます。なお、セキュリティの定義については、何も定義していない場合、WoTPy では nosec が適用されます。
properties では、TuyaのAPIで得られるスマート加湿器の情報に合わせた定義をしていきます。
... "properties": { "status": { "type": "object", "properties": { "switch": { "type": "boolean" }, "countdown": { "type": "string", "enum": ["cancel", "1", "3", "6"] }, ...... "colour_data": { "type": "number", 'minimum': 0, 'maximum': 255 } } } },...actions でもproperties と同様に定義していきます。
... "actions": { "updateStatus": { "input" :{ "type": "object", "properties": { "switch": { "type": "boolean", } }, ...... }, }, },...Thing Description についての詳細は、 WoT Thing Description とはや Web of Things (WoT) Thing Description をご覧ください。
また、Thingの作成や公開、Handlerの追加、Webサーバ部分の追加に関する説明は、myCobotを用いた実装例のページやコード例全体をご覧ください。
使用例#
Python コードを実行し、http://localhost:9090/ にて Thing Description のパスを確認しアクセス(http://localhost:9090/tuyasmart...)します。
Thing Description でそれぞれ href で定義されているリンクへアクセスします。
本サンプルでは、API に対して curl などで、Protocol Bindings に従いアクセスします。
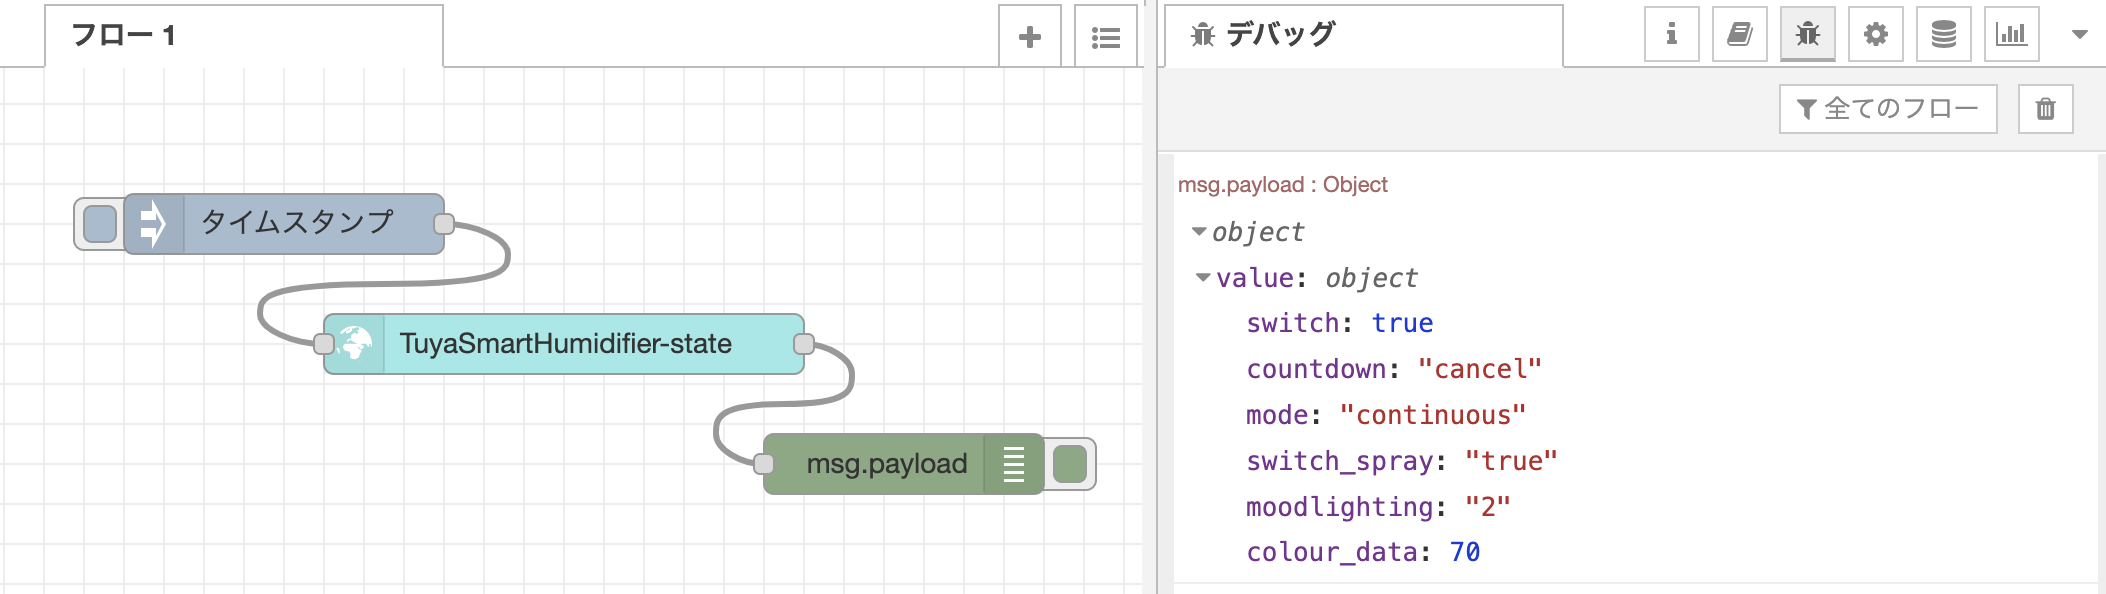
# Property 状態の取得$ curl http://<ip address>:9090/tuyasmart.../property/state{"value": {"switch": true, "countdown": "cancel", ...}}
# Action 加湿器の操作$ curl -X POST -d '{"input":{"switch":True}}' -H 'content-type:application/json' http://<ip address>:9494/tuyasmart.../action/updatestatus{"invocation": "/invocation/..."}次に生成された Thing Description (http://localhost:9090/tuyasmart...)を元にして JSON-LD ファイルを作成します。
なお、試験的実装段階の WoTPy を使用しているため、W3C WoT仕様の現行バージョンより遅れていることがあります。そのためsecurityDefinitionsがサポートされていないなど、議論や実装が進められている段階のため、最新の情報や変更にご注意ください。
そのため、生成される Thing Description に追記や修正を行なった上で、node-red-nodegen を使用してノードモジュールを作成します。
Thing Description 全体のサンプルはこちらです。
npx node-red-nodegen smart-humidifier-td.jsonld.jsonldnpm --prefix ~/.node-red install ./node-red-contrib-wottuyasmarthumidifier状態を表示・操作をする#
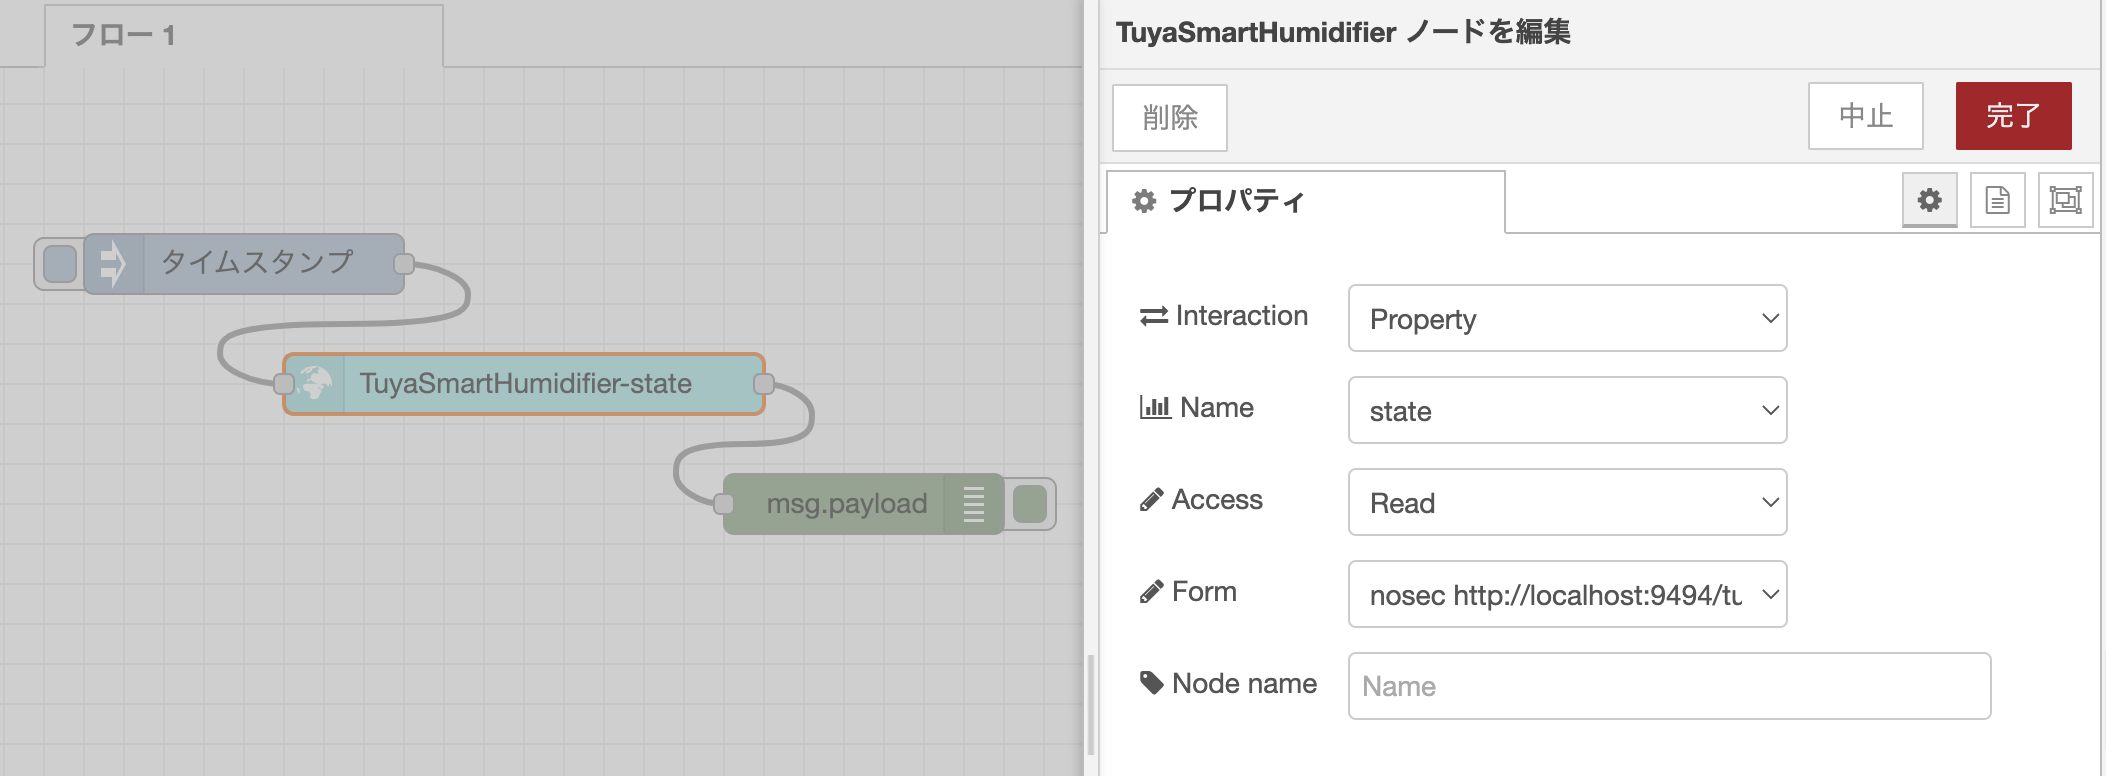
下記のようにTuyaSmartHumidifierのノードを編集することで、加湿器の状態を表示することができます。
- Interaction: Property
- Name: state
- Access: Read
- Form:
nosec https://localhost:9494/...
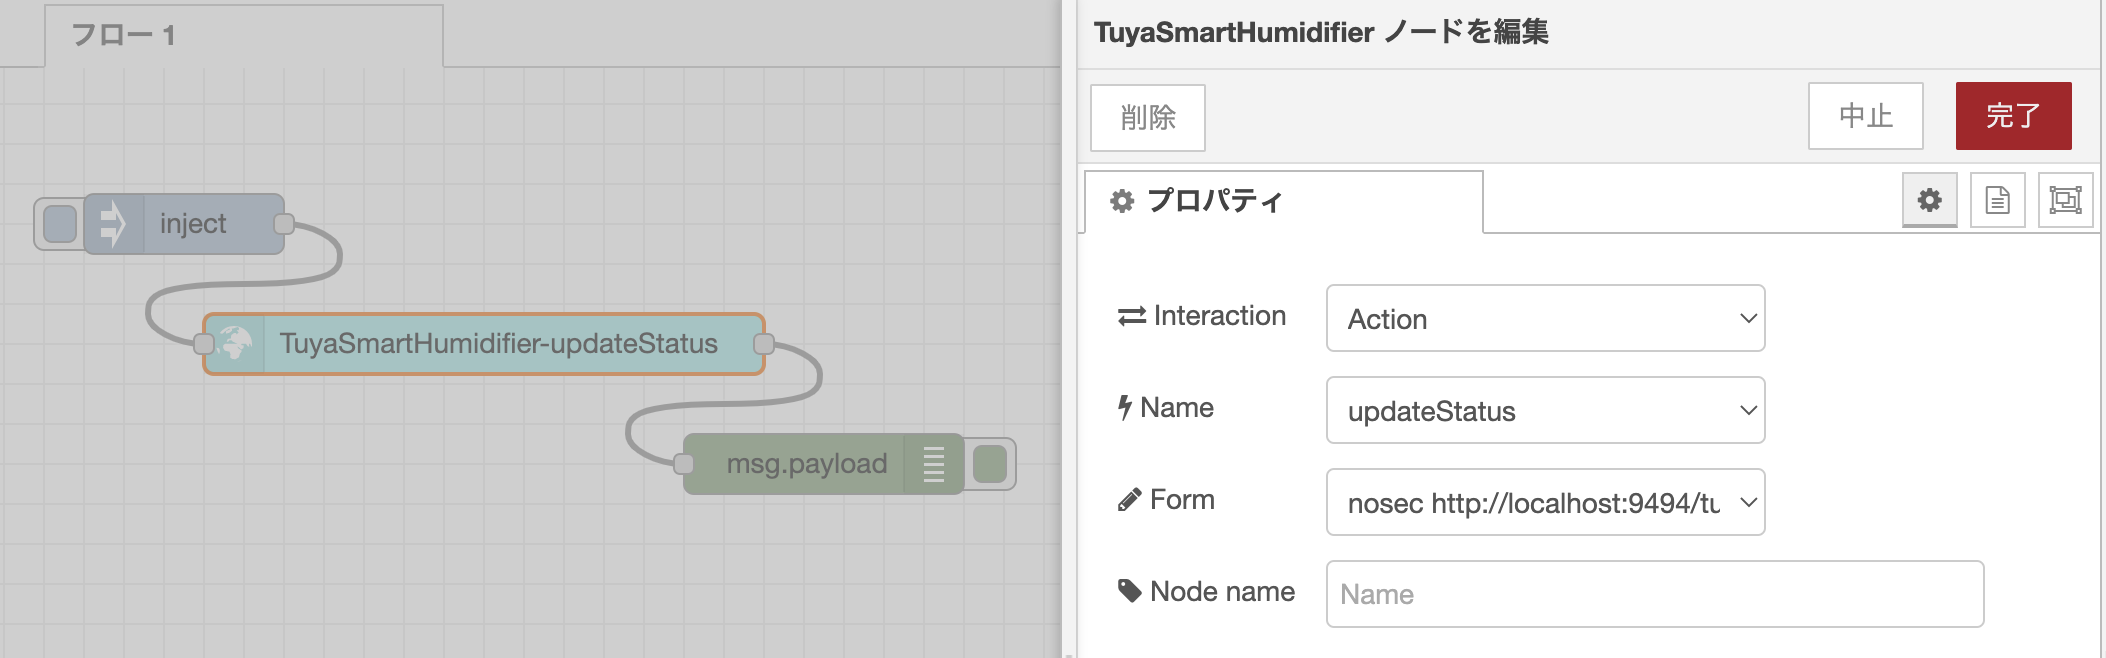
また、下記のようにTuyaSmartHumidifierのノードを設定し、
- Interaction: Action
- Name: updateStatus
- Form:
nosec https://localhost:9494/...
injectノードで下記のようなpayloadを送ることで、加湿器を操作することができます。
# 加湿器をオンにするmsg.payload = {"input":{"switch":"True","switch_spray":"True","moodlighting":"2","colour_data":100}}
# 加湿器をオフにするmsg.payload = {"input":{"switch":"False","switch_spray":"False","moodlighting":"3"}}